How to Make a Snow Rose Quilt

I've always loved the classic Around the World quilts. The other day I was playing around with the idea, doodling some alternatives, when it came to me: what about snowballing one corner of each square? Then I thought: what if I offset the center? And what if I mixed up the accent colors?
A dozen questions later, I ended up with a handful of variations I loved (and more to discover, I'm sure). And so, the Snow Rose quilt was born.
SNOW ROSE QUILT
Skill Level: Advanced Beginner
Finished Size: 56" x 56"
Seam Allowance: All cutting instructions factor in a ¼" seam allowance
Yardage/WOF: Width of fabric (WOF) is assumed to be 42"
Materials
Accent Fabrics: you’ll need a total of (196) 2½" squares. Don’t have the necessary scraps? Want to use yardage? You’ll need five ¼ yds. (FQs will work too) of different fabrics.
Background Fabric: 3 yds. (you can get away with 2¾ yds. but it leaves no room for error: if you want extra room to make mistakes (like me!), get the extra ¼ yd.)
Binding: ½ yd.
Backing: I love the idea of pairing the "scrappy" triangles on the front with a scrappy back, but if you’d prefer to have a single fabric back, you’ll need 3¾ yds. of backing fabric.
Cutting Instructions
Cut the following pieces (total number of pieces required are in parentheses):
Accent Fabrics: 2½" x 2½" (196)
If you’re using yardage, here's how I'd cut it:
Fabric A, B, C, D: 2½” x WOF (3):
subcut (2): 2½" x 2½" (16)
subcut (1): 2½" x 2½" (7)
Fabric E: 2½” x WOF (3):
subcut (2): 2½" x 2½" (16)
subcut (1): 2½" x 2½" (8)
Background Fabric: 4½" x 4½" (196)
Here’s how I’d cut my squares out:
4½" x WOF (22):
subcut (21): 4½" x 4½" (9)
subcut (1): 4½" x 4½" (7)
Binding: 2½" x WOF (6)
Block Assembly
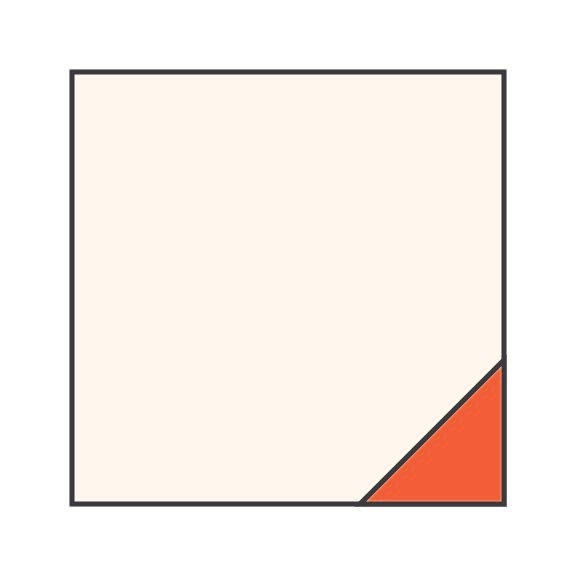
To start, you’re going to snowball one corner of each of your 4½" Background Fabric squares with a 2½" Accent Fabric square.
How do you snowball the corner of a block, you ask? Don't worry: it's easy! To start, draw a diagonal line on the back of a 2½" square, then line it up with the corner of a 4½" piece, pin, and sew down the diagonal line (step 1). Trim the corner (along the dotted line in step 2), leaving a ¼" seam allowance (step 3). Press. And voila (step 4). Repeat until you’ve snowballed a corner of each (196) background fabric blocks.

Step 1

Step 2

Step 3
Step 4
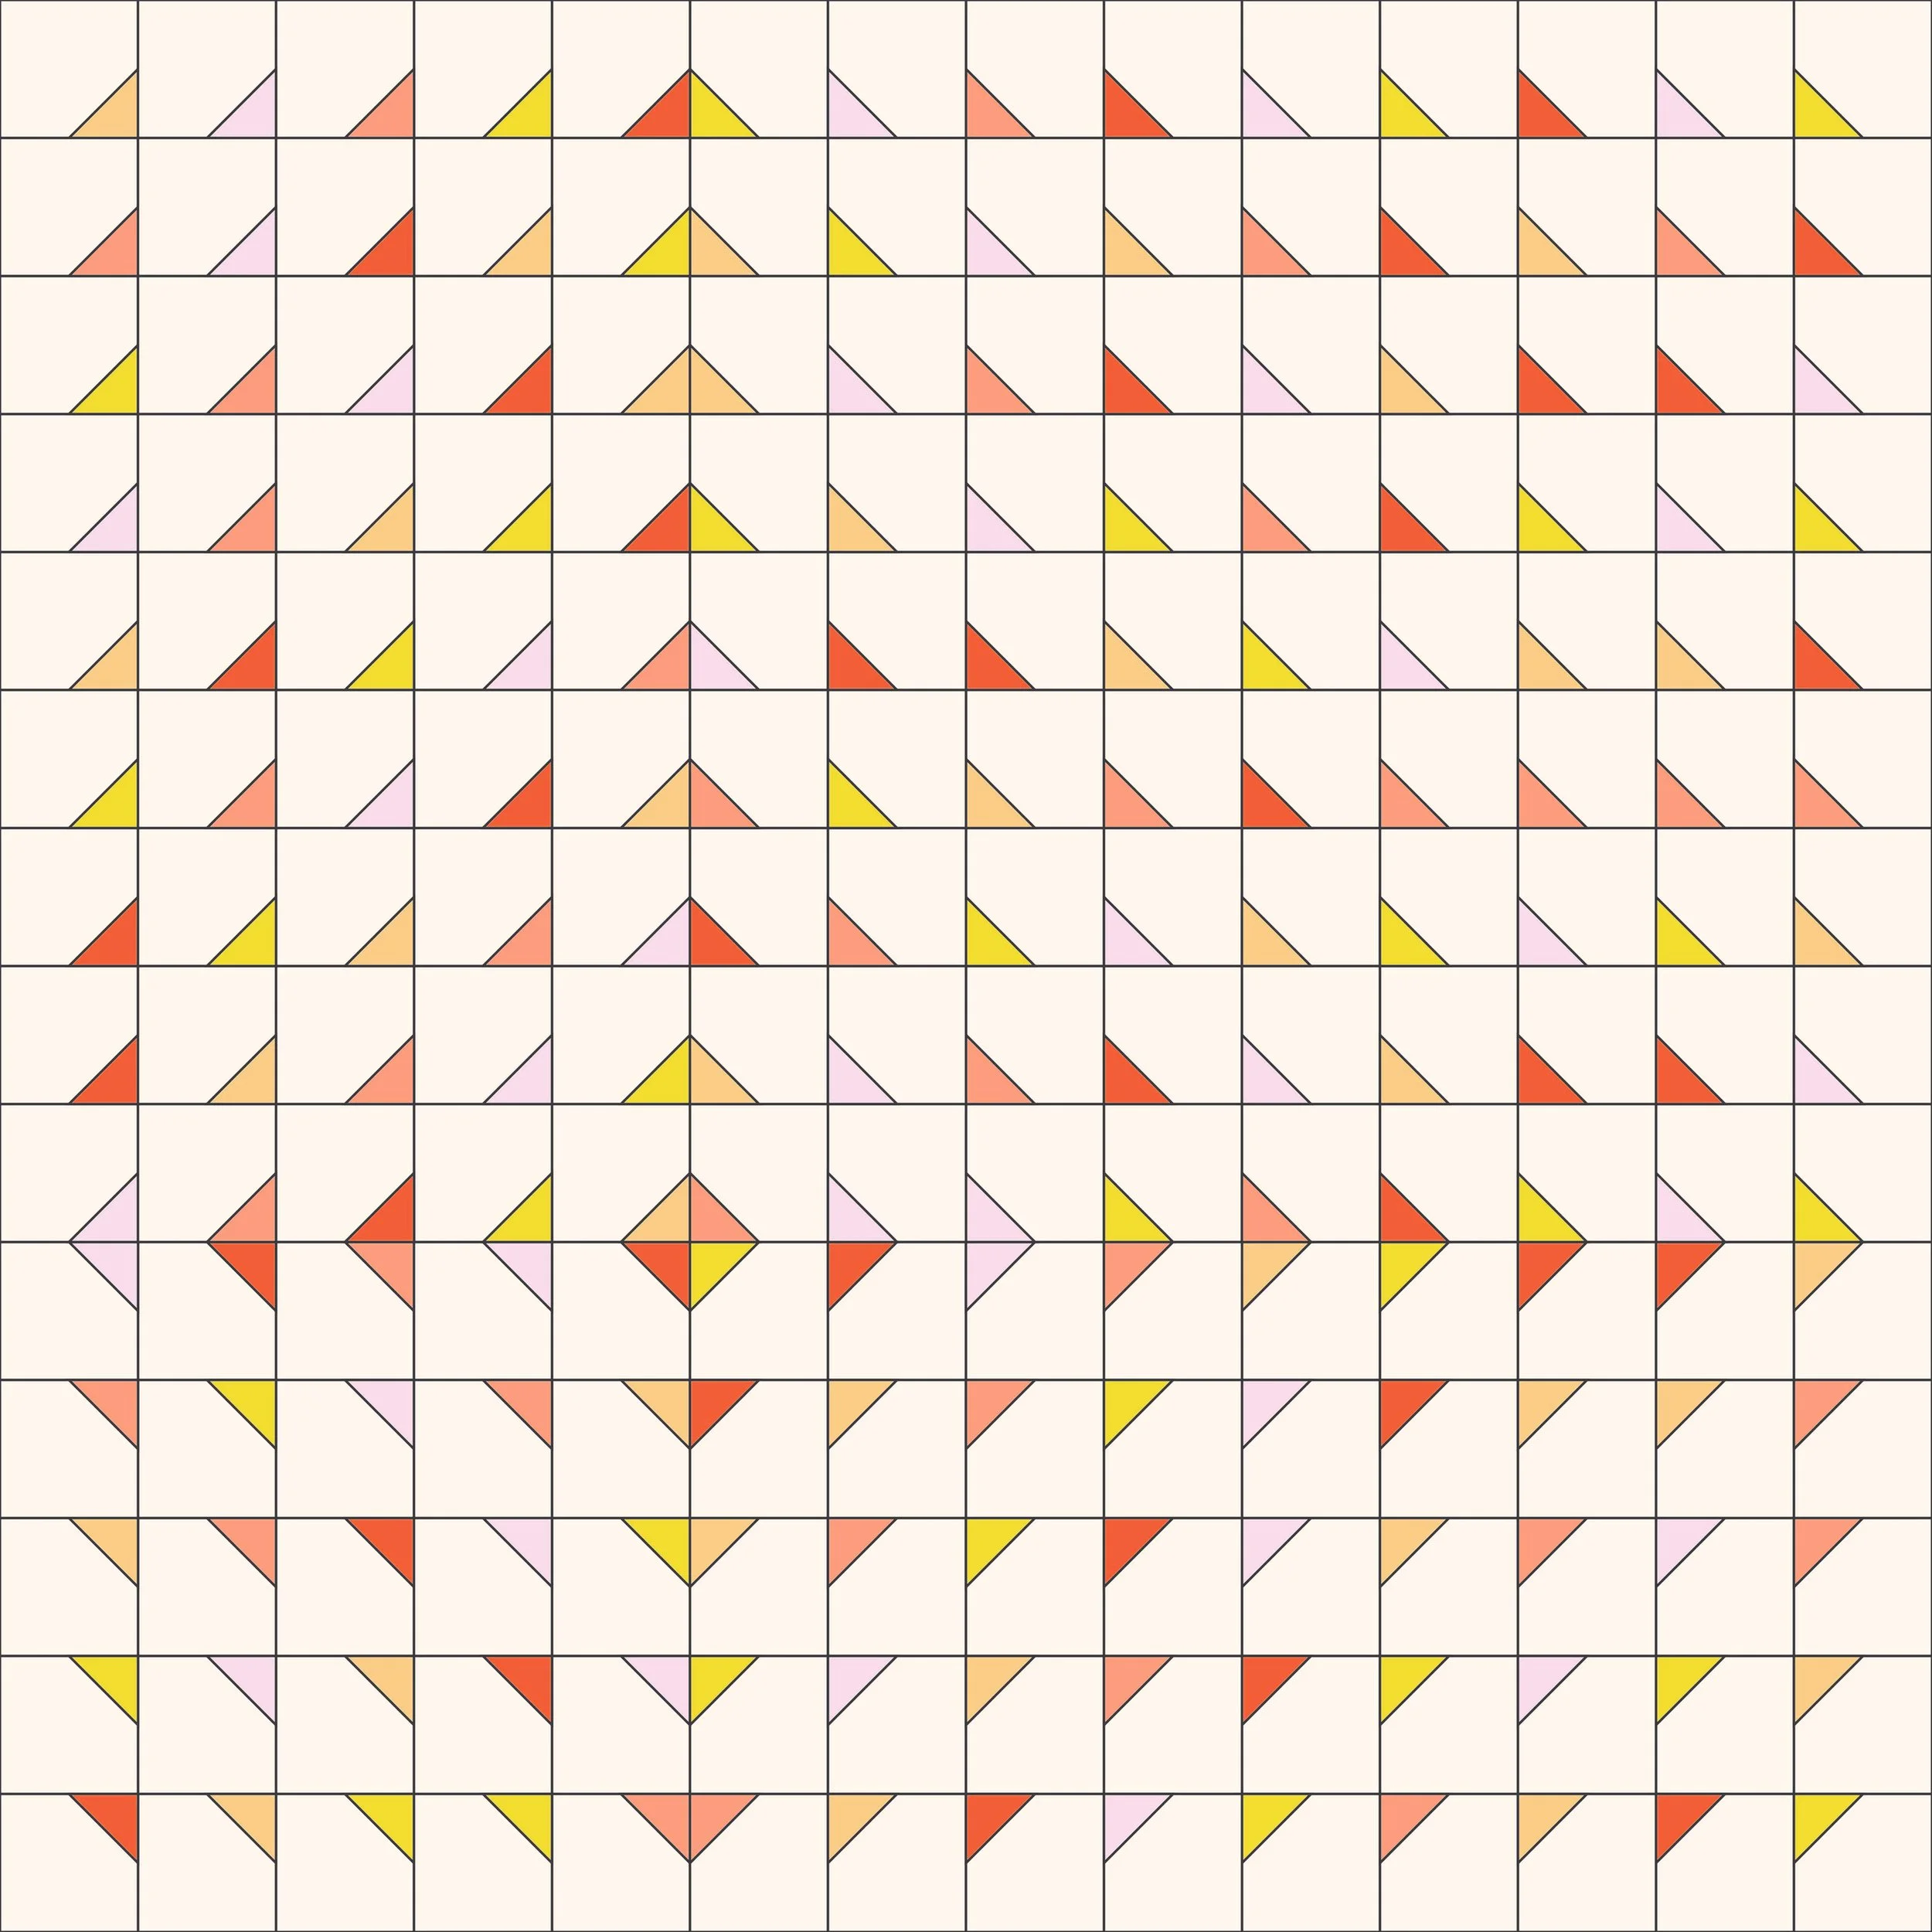
Quilt Top Assembly
Once you’ve got all your blocks ready to go, it’s time to lay them out following the diagram below (14 blocks to a row and to a column). Once you’ve got an arrangement of your scrappy (or not-so-scrappy) blocks that you like, sew it all together (by rows first or by columns: it doesn’t matter!).

Finishing Instructions
BASTE + QUILT
Trim the backing fabric to size. Place the backing fabric wrong side up on a flat surface, followed by the batting, and then the quilt top right side up. Baste using your preferred method and quilt as desired.
TRIM + SQUARE UP
Square up the quilt, trimming the excess batting and backing.
BIND
Make the binding tape by joining the strips right sides together on the diagonal, pressing seams open. Fold the tape in half lengthwise with the wrong sides together and iron flat. Line the raw edges of the binding tape to the edge of the quilt and sew. Fold the tape over and either whipstitch the binding by hand or machine stitch the binding to attach it.

You May Also Enjoy These Quilting Tips and Guides: