Intentionally Imperfect: Improv Quilting with Curves
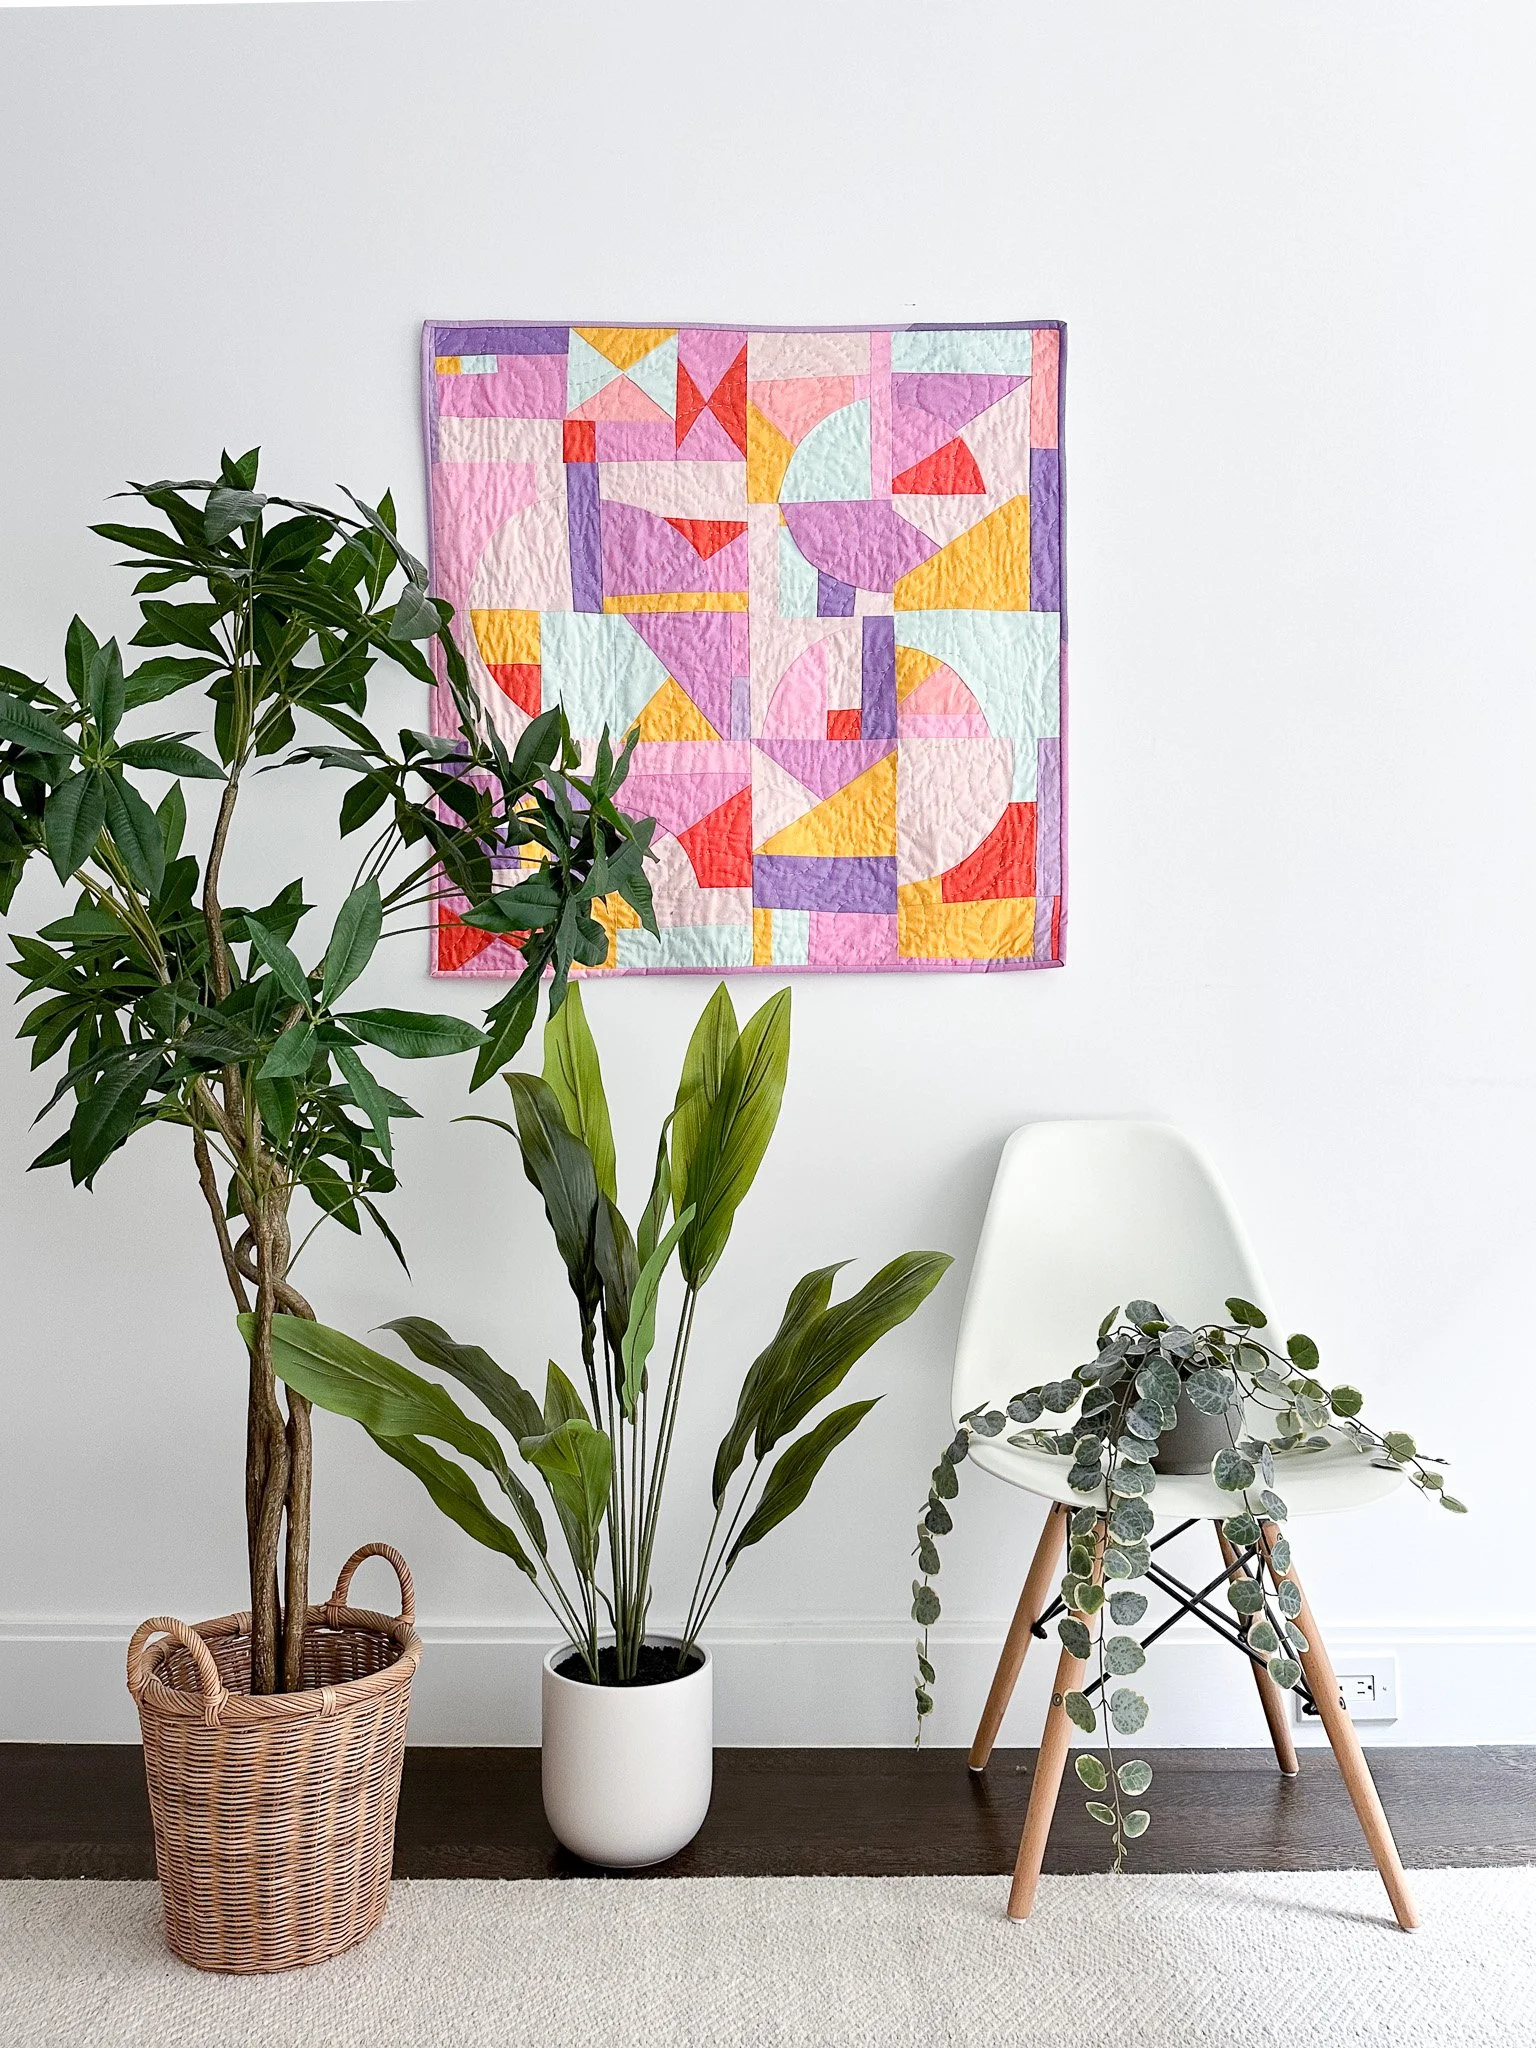
Even with a mix of improv shapes, the recurring circles guide the eye and hold the composition together.
Curves can feel like one of the most mysterious shapes in improv quilting. Unlike stripes, checkerboards, or L-shapes where the construction feels more intuitive, curves can be a little confusing at first. They don’t follow a straight line. You can’t just match up the edges and sew. And it can be surprisingly hard to quiet the impulse to be perfect, especially when your curve is 99.99% guaranteed to turn out imperfect, maybe even glaringly so.
But here’s the secret: curves don’t need to be perfect to be powerful.
Improv curves bring energy, motion, and softness to a quilt. A slightly off-kilter arc or uneven edge doesn’t weaken the design, it makes it sing. It’s not about symmetry or control. It’s about momentum, rhythm, and the freedom to let your shapes evolve as you sew.
In this post, I’ll walk through how to make an improv curve without templates, and why they’re worth adding to your improv patchwork toolbox. You’ll also find a few ideas for how to build a new improv project around curves. So, let’s dive in!
How to Sew an Improv Patchwork Curve
Cutting and sewing curves might sound intimidating, but you don’t need a template—or even a ruler—to get started. Just two rectangles of fabric, a rotary cutter, a fabric pen/pencil, and a pin.
Here’s a quick overview of the way that I love to cut and sew improv curves:
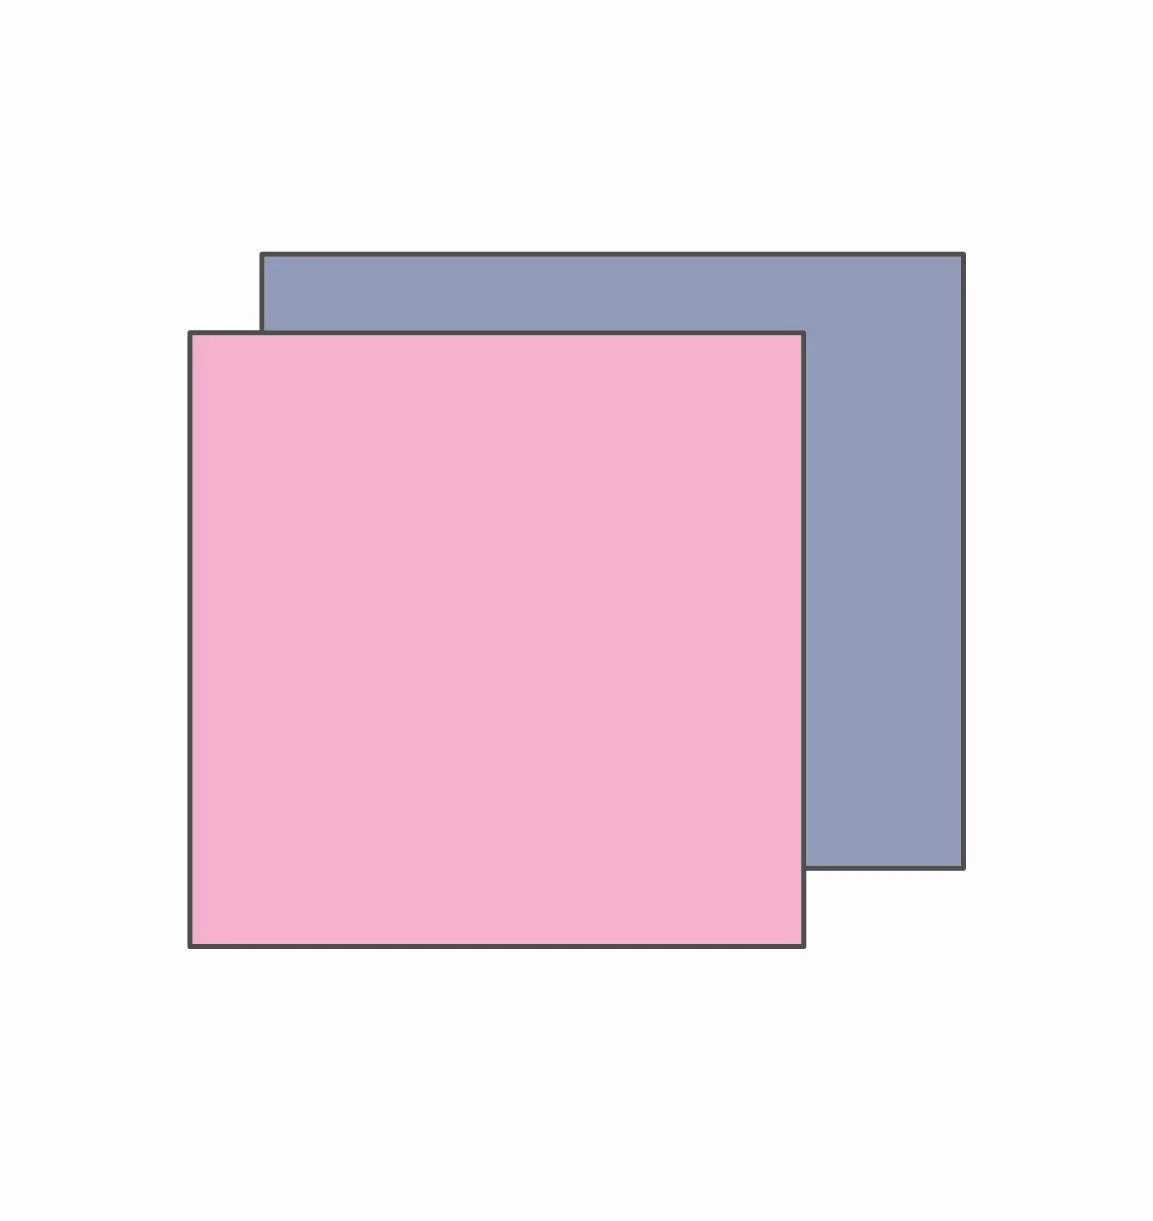
1. Prepare the Fabric.
Stack two rectangles, right sides up. If they’re different sizes, place the smaller one on top. Align the bottom left corners (if you are right-handed) or bottom right (if you are left-handed).
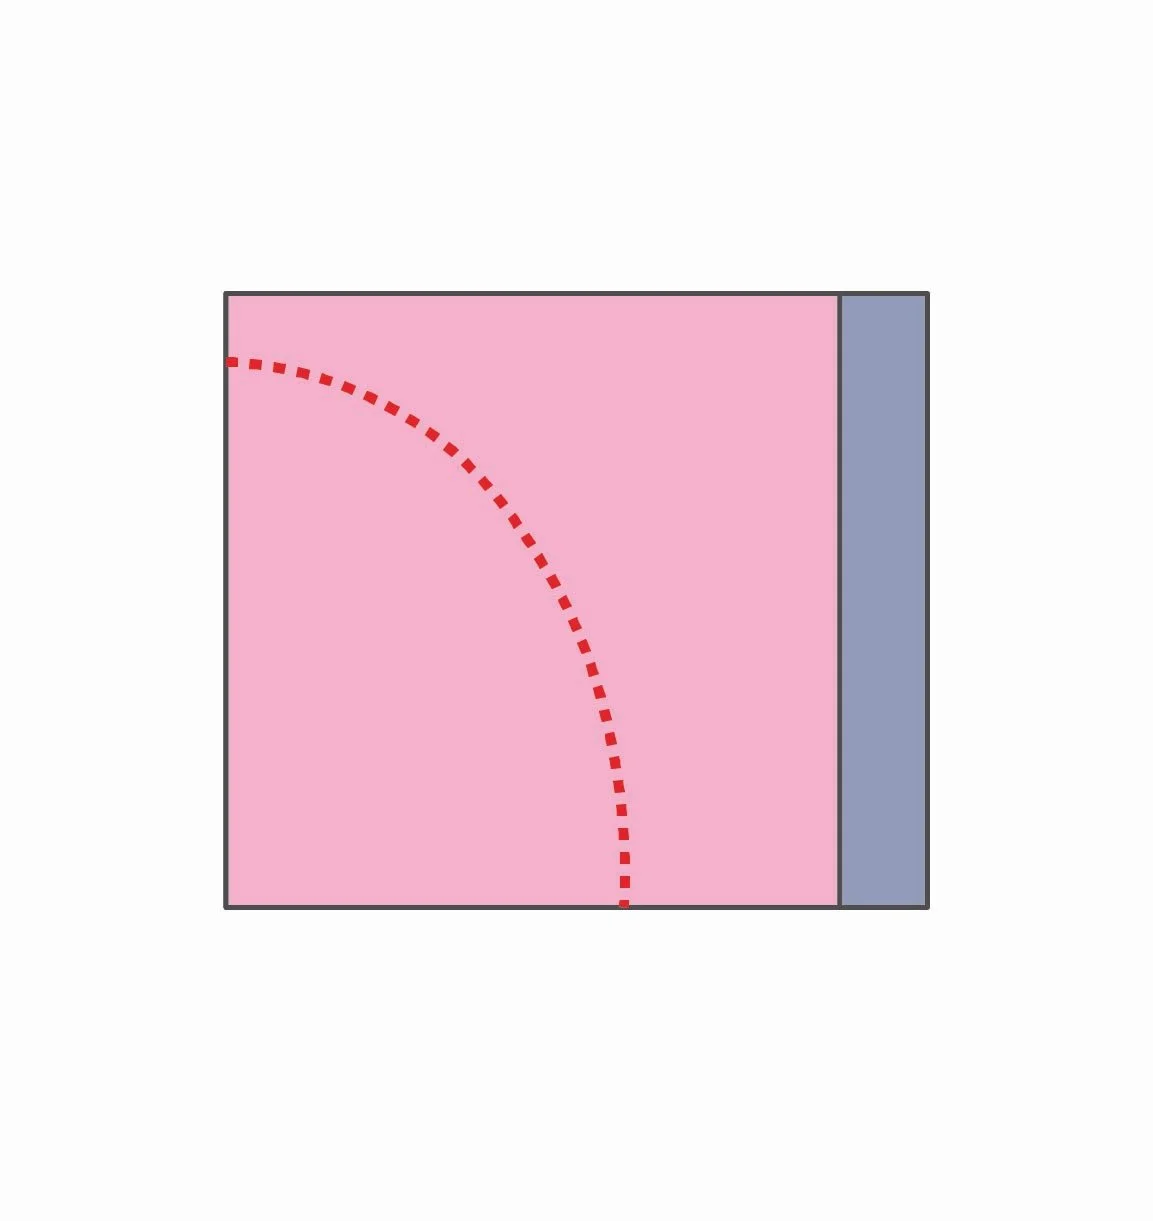
2. Cut the Curve
Use a rotary cutter to freehand a quarter-circle or elliptical curve, starting from the bottom edge and curving up toward the side on your non-dominant side (for a gentler curve, more like a single “wave,” cut from the bottom edge up toward the top).
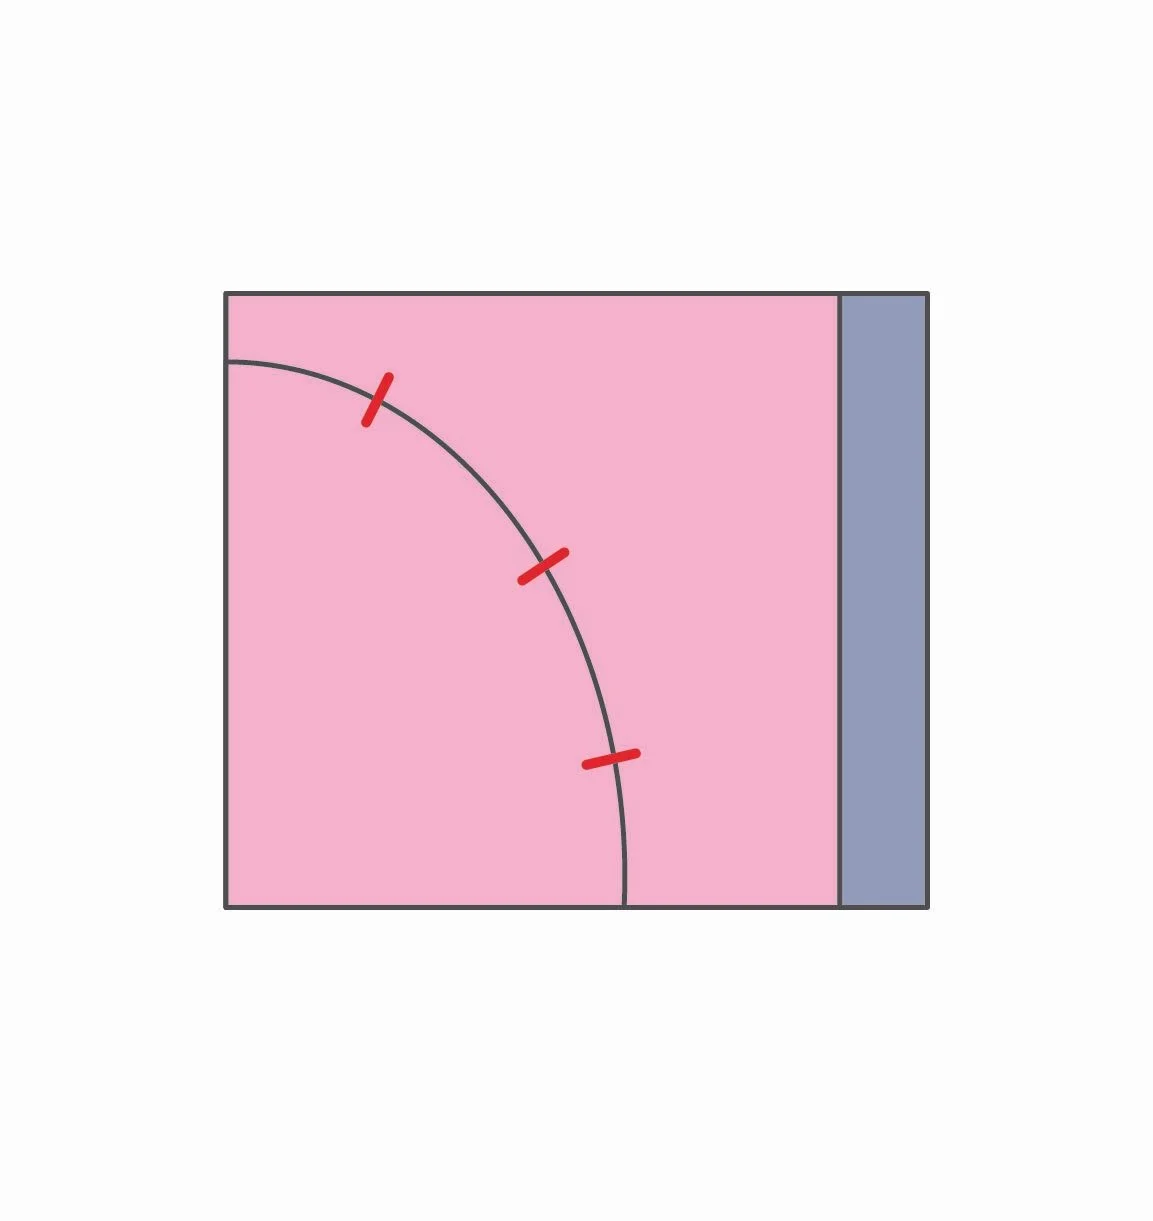
3. Mark for Alignment
Do not move your pieces! Mark the apex of the curve, then extend that mark to the fabric underneath on both sides of the cut. Optionally, add quarter marks along the curve to help remember how the cut matches up (in case things get mixed up on your cutting mat!).

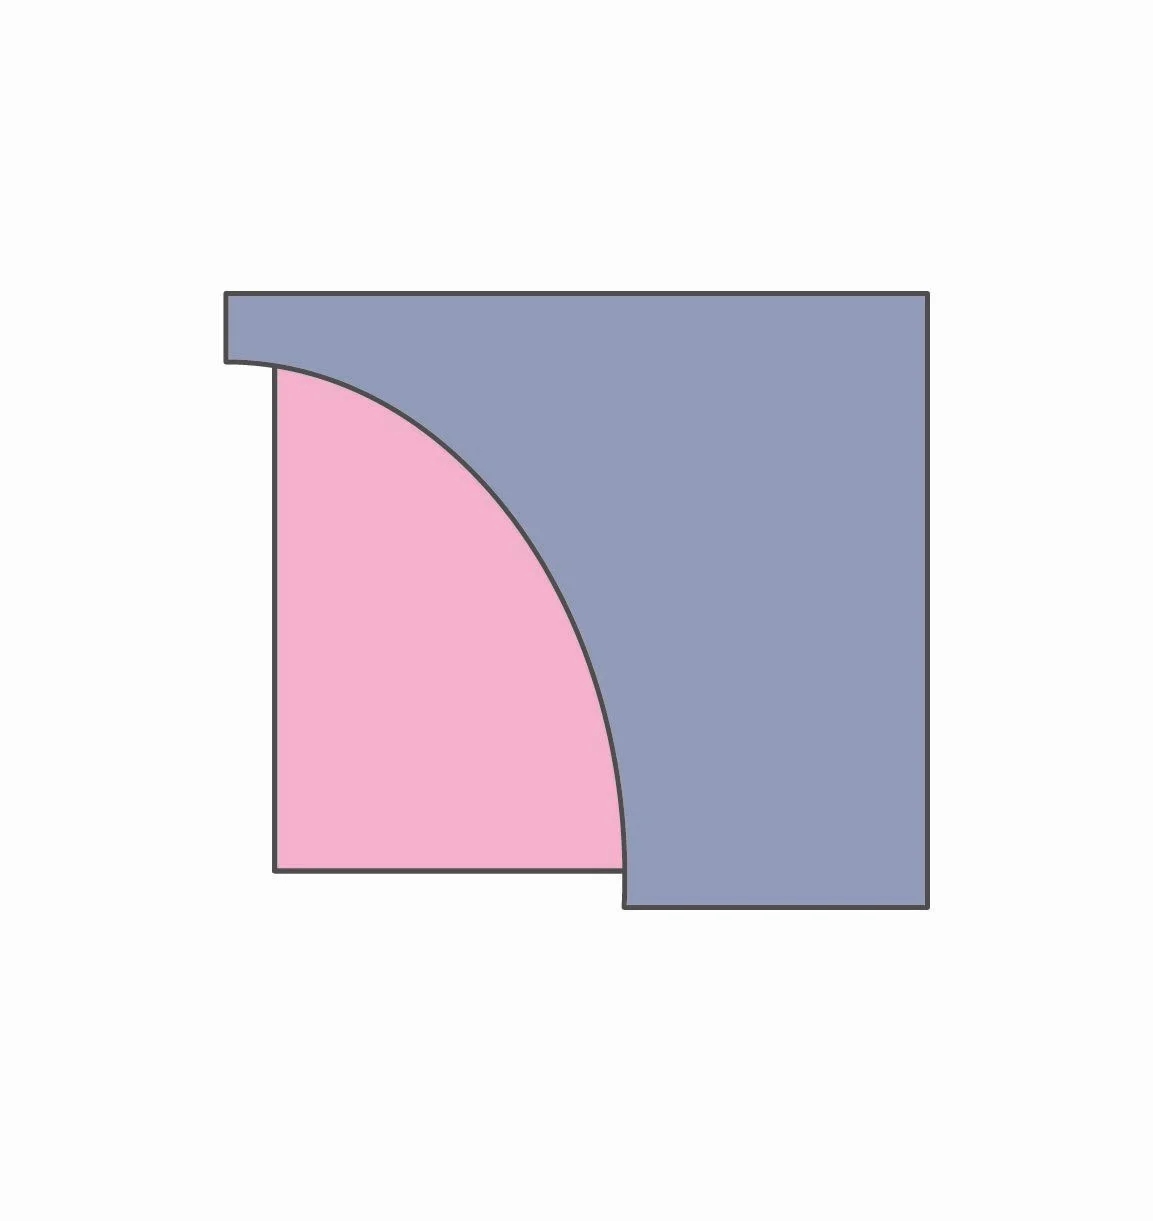
4. Separate and Re-Pair the Curves
Separate the fabric pieces and re-pair them so each new unit has one inner curve and one outer curve. Flip the outer curve over the inner, using the apex-mark as the pivot, match the marks, and pin at the center point.

5. Sew the Curve
Before lowering the presser foot, align the fabric edges for the first half of the curve. Start at the center pin and smooth toward the seam start. The outer piece will overhang the inner: that’s expected. Begin sewing where the inner edge meets the outer, and go slowly, keeping to a ¼" seam and adjusting as you go.
Tip: The outer piece will always look too big, because it is. Let it float over the edge. That built-in imbalance is what makes the curve work.
6. Press the Seam
Press with an up-and-down motion. Let the seam fall to the side with the least resistance. If needed, make small snips in the seam allowance to help the block lie flat.
Why Curves Work in Improv Quilts

The eye follows the curve, trying to complete what’s missing. That quiet motion brings energy to even the gentlest arc.
Sharp angles and perfect symmetry? Sure, they make a statement. But curves? They’ve got their own kind of drama.
Where our eye often delights in the pattern and structure of straight-edge-angled patchwork, curves offer something different. They move your eye across the surface in arcs and waves, creating a sense of movement and energy that feels both dynamic and grounded.
Curves can soften a composition. They can breathe across the quilt top. They can create moments of surprise and flow, pulling your gaze through the piece.
And when those curves are a little imperfect? A little unbalanced? That’s where things can really come alive.
In improv quilting, curves often carry the feel of an organic line, beautiful in its imprecision, in its flow. Like waves washing up on a beach. Like the loops of someone’s handwriting. They’re not perfect, but they’re alive with presence.
Even a single round or arcing shape in a field of straight lines can shift the mood of a quilt. It becomes a focal point, not because it demands attention, but because the eye wants to complete the curve, to follow it.
Build Confidence with Curves
If you’re wondering how to start an improv quilt that includes curves, one helpful entry point is to limit your visual vocabulary, not just in fabric, but in shape. Try working within a simple underlying block structure, like stripes, rows, or a loose grid, and repeat a single curved motif in varied ways, without introducing other shapes.
For example, you might explore:
Gentle, stacked curves across horizontal bands to create a sense of movement
Quarter-circle curves used at different scales as a central motif
A square-based layout, like an offbeat Drunkard’s Path, or a series of four-block units that form an imperfect circle when paired together
This kind of constraint-driven quilting helps reduce overwhelm. You’re not chasing perfection, you’re creating a container that allows you to play. And the more you repeat, the more natural it feels, and the more you’ll start to see the potential for further explorations, concepts, and ideas.
Imperfection = Energy

I love how the curve shifts the pace, energy, and direction of the visual flow, it invites your eye in and keeps it moving.
When I use curves in my own improv quilts, I’m not chasing accuracy, I’m chasing movement and energy. The slight wobble, the irregular arc, the not-quite-even edge… they all contribute to that alive, organic flow that I love in improv quilting.
I often use the curve—especially quarter-circle curves—as a kind of through line across the quilt top. I might aim to build out full circles, letting them emerge gradually across blocks or rows. Sometimes I’m loosely referencing a Drunkard’s Path, but letting it go a little wonky. And sometimes, I deliberately interrupt the curve, cutting it short, slicing through it, or filling out a blank space with another shape entirely.
But by returning to that curve again and again, even when it’s incomplete or broken, I can create a sense of flow and cohesion that anchors the composition.
This is just one way to approach curves in improv. You can layer them, echo them, or let them drift off the edge. It doesn’t have to be perfect or even symmetrical. It just has to feel like it belongs.
It’s not about correcting or perfecting the arc. It’s about responding to it.
Remember
If your first few curves feel awkward, that’s okay!! You don’t need special tools or precision to start, just a rotary cutter, a fabric pen/pencil, a pin, and a willingness to let the fabric guide you. Go slow, embrace the imperfections, and remember: sameness isn’t the enemy, and neither is wobble. Both can lead somewhere interesting.
Ready to Practice (Without the Pressure)?

Follow the Fabric. Trust your instincts.
Chaos Collage is your invitation to let loose. This creative playbook throws out traditional rules in favor of wild, energetic patchwork—and gives you the tools to do it with confidence. It’s not messy; it’s momentum.
Perfect for makers who want to explore bold compositions with a balance of structure and spontaneity, this playbook helps you embrace surprise, scale, and visual tension in a totally unique way.
Why You'll Love It
Intuitive design, big visual payoff: Build bold, high-impact quilts with an easy to follow framework
Guided creative prompts: Tips on contrast, color, and composition help you turn chaos into cohesion
Built for momentum: Skip the templates and sew from the gut
Cut without second-guessing: Freehand cutting video demos walk you through each shape in action
Details
Instant download PDF
Skill level: Advanced Beginner to Easy Intermediate
Standard American terms and measurements
Includes access to companion video tutorials
Includes flexible layout guidance for a Wall Hanging (24” x 30”) or a Crib Size (36” x 48”) quilt
© 2025 Broadcloth Studio. All Rights reserved. Resell of finished product with pattern credit allowed.
Want to explore improv curves and experiment with how different shapes interact across a quilt?
The Chaos Collage Playbook is a great fit for quilters who love bold shapes, unexpected movement, and building compositions one shape at a time.
It’s full of creative prompts and a flexible framework for improvising block by block. No templates, rulers, or strict patterns required.
Plus, the Playbook includes real-time video demos that walk you through how to cut, sew, and assemble quarter circle curves (and plenty of other playful shapes) in a way that’s unfiltered and totally approachable.
You May Also Enjoy These Quilting Tips and Guides: